
STRoPP® System
(single tunnel repair of plantar plate)
The plantar plate is an important structure for maintaining toe stability. CrossRoads designed our STRoPP® (single tunnel repair of plantar plate) system to repair the plantar plate through a small single, supported tunnel instead of multiple drill holes through the bone.
Step 1
After dorsal surgical dissection and releasing the collaterals, perform a Weil or other metatarsal shortening osteotomy.
Translate the metatarsal head proximally, and temporarily fixate it with a 1.6mm k-wire (included in kit). Resect the dorsal
shelf to better visualize the plantar plate.
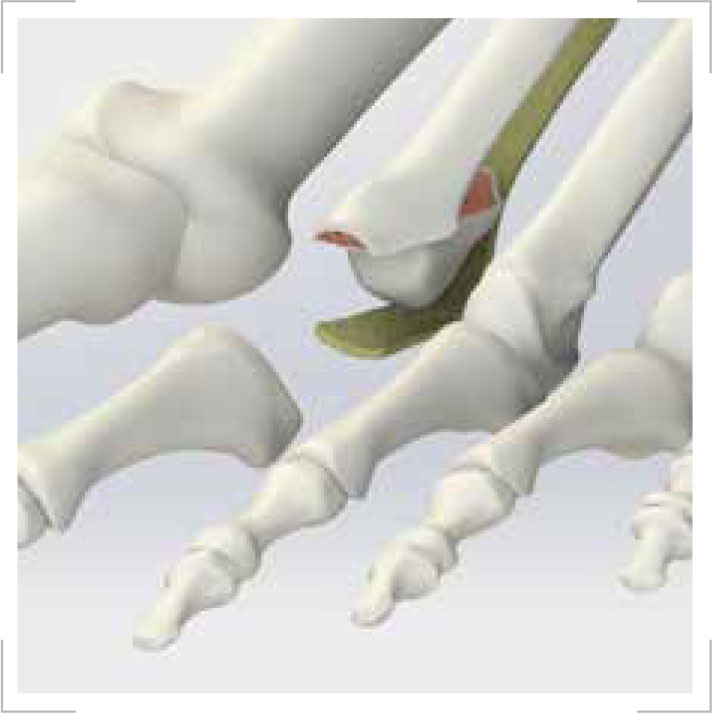
Step 2
Utilize an Allis clamp or a Locke phalangeal clamp to plantar flex the proximal phalanx and expose the joint. Release the plantar plate completely from the base of the proximal phalanx using a #64 blade, and reflect it off the underlying flexor tendon.
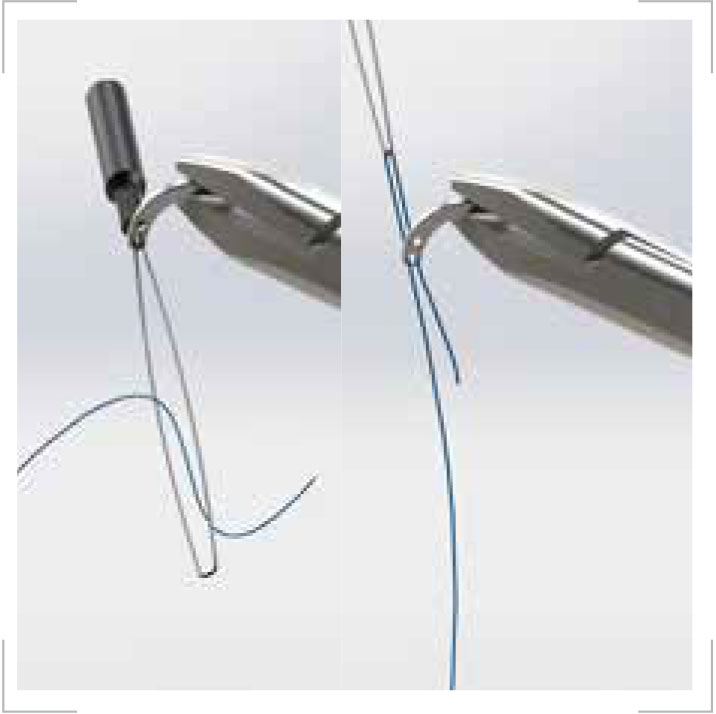
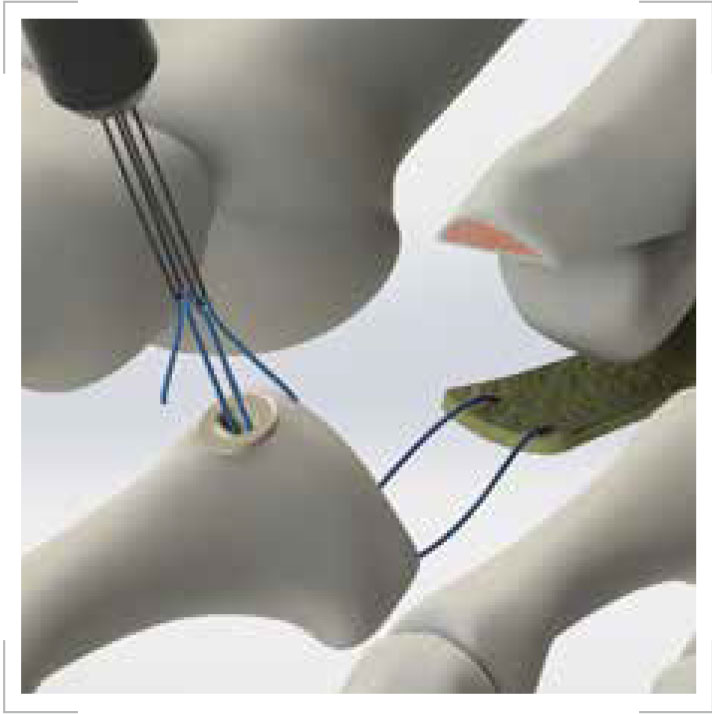
Step 3
The surgeon’s choice of non-absorbable size 0 suture(s) is loaded onto the STRoPP™ needle. The needle is supplied with a
threader for convenience.

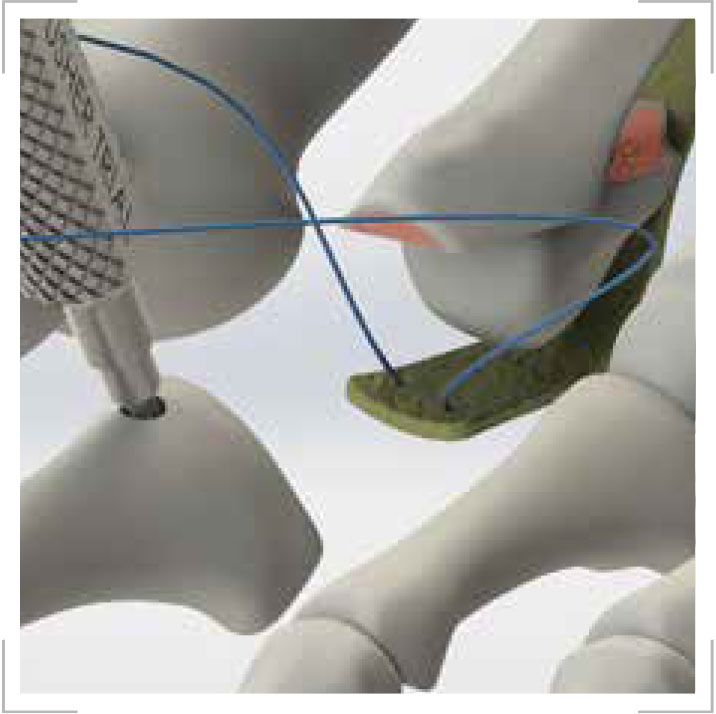
Step 4
Stabilizing the plantar plate with a pick-up, pass the STRoPP needle through the plantar plate and create a horizontal mattress stitch.

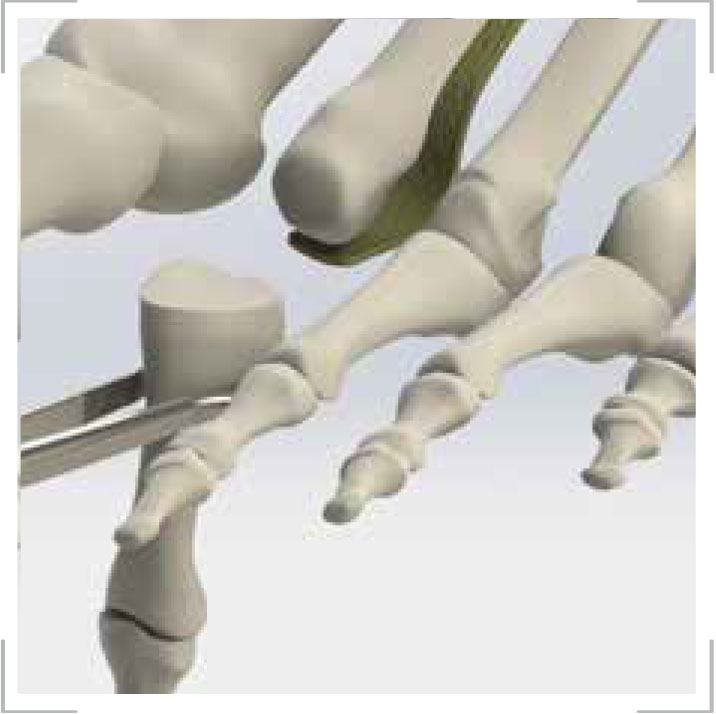
Step 5
In the base of the proximal phalanx, utilize the 2.8mm pin (included in the kit) or a 2.7mm reamer (packed with the CrossTIE® hammer toe kit) to prepare a tunnel for the STRoPP button. Use of the 2.7mm reamer generally allows easier STRoPP button insertion than the 2.8mm pin.
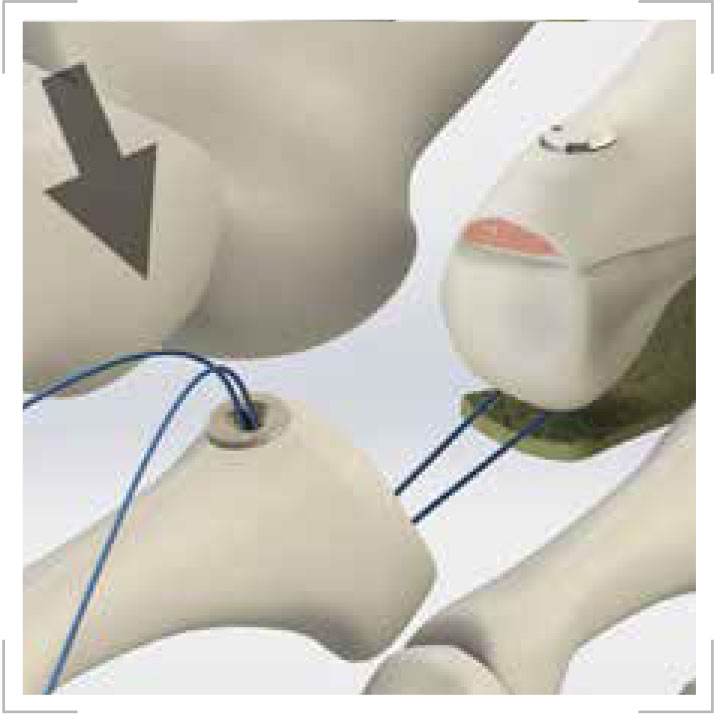
Step 6
After the bone tunnel is made, use the provided trial to ensure the tunnel is sufficiently prepared for the implant.

Step 7
Roughen the plantar aspect of the base of the proximal phalanx with a bone rasp. Fully seat the implant into the prepared bone tunnel. Insert the STRoPP Dual Suture Passer through the bone tunnel from dorsal to plantar and separate the loops. Pass one suture thread through each loop.
Step 8
Slowly pull the loops through the implant. Remove the k-wire from the metatarsal head.

Step 9
Reposition the capital fragment as needed and fixate the metatarsal shortening osteotomy. A CrossRoads 2.0mm Snap-Screw™ may be utilized.
Step 10
Translate the proximal phalanx proximally and tighten the sutures to remove all slack and tension the repair.
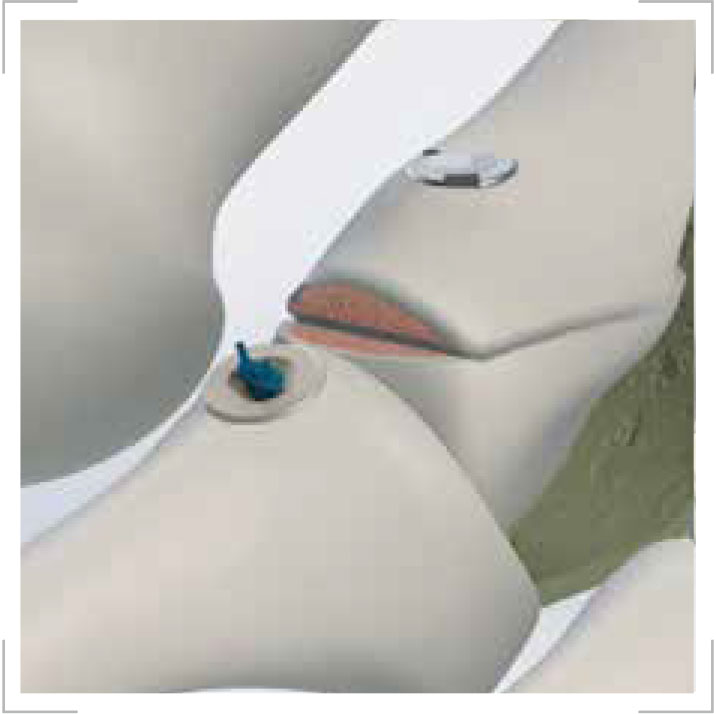
Step 11
Tie off the suture over the STRoPP™ tunnel button. The button should be recessed enough to allow three knots to be tied.
Contact Information
Use the contact form to let us know how we can help you!
For more information on miniBunion® go to www.miniBunion.com
For more information on dynaBunion® go to www.4Dbunion.com
Click here to find a foot doctor.
HEADQUARTERS
6423 Shelby View Dr. Suite 101,
Memphis, TN 38134
INFORMATION
Phone: (901) 221-8406